Using the SoundCloud API with the JavaScript SDK
Using the SoundCloud API
Setup a Basic HTML Document
We will create a basic HTML page which will serve as our homepage. We will also include the SDK here, so we can make use of its functionality.<!DOCTYPE html>
<html>
<head>
<title>Include SDK - Using SoundCloud API</title>
<script src="//connect.soundcloud.com/sdk.js"></script>
</head>
<body></body>
</html>
<script src="sdk.js"></script>
- Open up the page in a browser (Chrome recommended).
- Open up Developer Console in the browser (Ctrl + Shift + J, in Chrome).
- In the Console, type
SCand press enter.SCis a Javascript Object created by the SDK which we just included.
undefined error shows up then it is not loading correctly. Try refreshing and make sure the path to the SDK file (sdk.js) is correct.Register a SoundCloud App
To register a SoundCloud app, all you need is a SoundCloud account. If you don’t have one already, go ahead and create one. By registering an app, SoundCloud servers will be able to verify our request, so no one else can make a request on our behalf.Note: We can skip this step, if we are not going to use the user-login feature in our website. It will be explained in the next section.
-
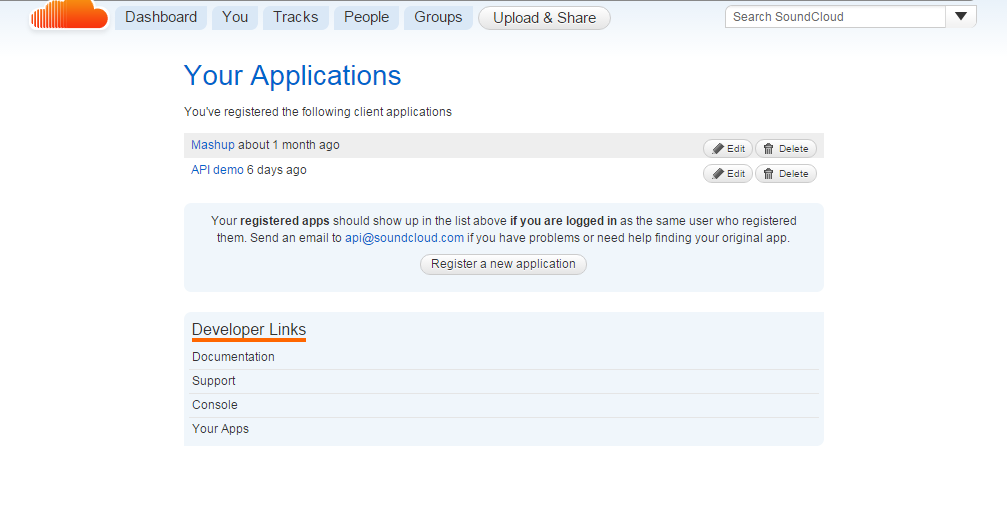
Open the SoundCloud apps page. Here any apps we have already created will be listed. Make sure you are logged in to your SoundCloud account. Note:
You do not need to make a separate account for this purpose. You can
use the same account which you use for personal purposes.
-
Click on the Register a new application button.
-
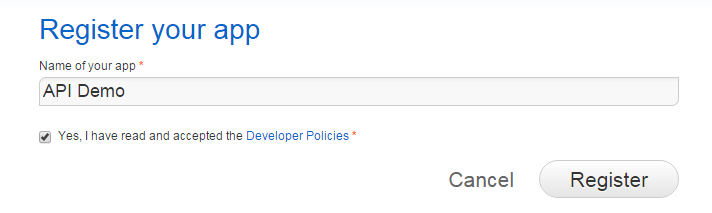
Give it a name and accept SoundCloud’s Developer Policies by checking the checkbox.
-
Click on the big Register button, to complete the app registration.
Initialize the Client
By “initializing the client”, we mean to make the client ready to exchange data between itself and SoundCloud API. We can do it in our basic HTML document, which we created earlier, or in an external .js file.The JavaScript syntax to do so is:
SC.initialize({
  client_id: "CLIENT_ID",
  redirect_uri: "CALLBACK_URL"
});
- The
CLIENT_IDis provided to us when we register our app. CALLBACK_URLis the URL tocallback.html, an HTML file which gets called after the user has logged in. We will create it soon.
Examples
If we open up browser console and typeSC., a list of methods associated with the SC object will appear. SC.get(uri, callback) is one of them, which is used for making GET requests to the API.Getting a List of Tracks
To get a list of random tracks, we can useSC.get() like this:SC.get("/tracks", function(response) {
for (var i = 0; i < response.length; i++) {
$("ul").append("<li>" + response[i].title + "</li>");
}
});
/tracks endpoint and expects a callback function. The response is stored in the response parameter of callback, which is an array of JavaScript objects with multiple properties, title being one of them. We can console.log(response[0]) instead of looping to see a whole object and its properties. Then we will know which properties we have access to.Notice, in this example we have not specified a callback URL during initialization. This is because here it doesn’t matter if we specify it or not. Either way our code will work. But when we will implement user-login functionality, it will matter and will be required so no one else can use our Client ID.
Embedding a Track
TheSC object offers another method, SC.oEmbed(url, options, callback), which embeds the SoundCloud player in our website and allows us to play a track of our choice.SC.oEmbed('https://soundcloud.com/username/complete-url-to-the-track', {maxheight: 200, auto_play: false}, function(res) {
$("#player").html(res.html);
});
- First we give it a complete URL of the track we want to play.
- In the options parameter, we set some options for the player. See more here.
- In the callback function, we replace the contents of an element (
#player) in our page with the HTML code for the player (res.html).
Implementing User Login
For the implementation of user-login functionality, we need to have a callback URL for authorization purposes. This is a requirement of the OAuth protocol. If you are curious about it, here’s a simplified explanation of : OAuth 2 Simplified. So let’s go ahead and update the app settings to include a callback URL ofcallback.html, which we are now going to create.Create the Callback Page
After a user has logged in, the pop-up window redirects to this file. In our case, we will name itcallback.html and it will reside in the same directory as our home page (index.html). This is the file we need to give in the callback field in our app settings.The code we need to use within the callback file is provided in documentation. However, the documentation is a little outdated, so we’ll modify it slightly to meet modern standards.
You can modify its message and design as much as you would like to , but for now, we will keep it as simple as possible:
<!DOCTYPE html>
<html lang="en">
  <head>
    <meta http-equiv="Content-Type" content="text/html; charset=utf-8">
    <title>Connect with SoundCloud</title>
  </head>
  <body>
    <h4>This popup should automatically close in a few seconds</h4>

    <script>
      document.onload = function () {
        window.opener.setTimeout(window.opener.SC.connectCallback, 1);
      }
    </script>
  </body>
</html>
Logging the User In
SC.connect(callback)
is the method for implementing the user-login feature. It opens up a
pop-up window, prompting the user to login to their SoundCloud account.
The basic usage is as below:SC.connect(function () {
console.log("User has logged in");
});
SC.connect(function () {
  SC.get("/me", function (response) {
    console.log("Welcome" + response.username);
  });
});
- After the user has logged in, they will be redirected to
callback.html, which we created earlier. - Then the pop-up window will automatically close, as we can guess by reading the code in
callback.html. - After that, our callback function will get called, in which a GET request to
/meendpoint is made usingSC.get()method. - As soon as the GET request completes, its callback function gets executed and a welcome message gets logged to the console.
/me
will return data about the currently logged in user. Therefore, using
it before the user has been logged in will result in an error message.Playing with the User’s Data
Once the user has logged in, there is so much more we can do. To demonstrate some of the power, I have created a demo website on GitHub. You can find the source code here and see it in action here.Let’s walk through two of the files. In
index.html, the four divs are of importance, as they get filled out with user data after user has logged in:<main>
<div id="ui">
<h2>Welcome <span></span></h2>
<img id="avatar" />
<div id="description"></div>
</div>
<!-- TRACKS -->
<div id="tracklist">
<h3>Your Tracks:</h3>
<ul></ul>
</div>
<!-- PLAYLISTS -->
<div id="playlists">
<h3>Your Playlists:</h3>
<ul></ul>
</div>
<div id="player"></div>
</main>
script.js: all of the magic happens here. Most of the code will be familiar to us, but let’s walk through it quickly:// Initialization of SDK
SC.initialize({
client_id: "21832d295e3463208d2ed0371ae08791",
redirect_uri: "http://mustagheesbutt.github.io/SC_API/callback.html"
});
- First we initialize our app. Notice, this time we have
redirect_urispecified as ourcallback.htmlpage. This URL or URI should exactly match with the URL we have specified in our app settings.
// Login handler
var user_perma;
$("#login").click(function () {
    SC.connect(function () {
        SC.get("/me", function (me) {
            user_perma = me.permalink;
            setUI(me.username, me.avatar_url, me.description);
        });
        if (SC.isConnected) {
            $("header, main").addClass("loggedIn");
        }
        getTracks();
        getPlaylists();
    });
});
- Then we attach a click event handler to the
#loginbutton. Which when clicked, will executeSC.connect(callback)which opens a pop-up window prompting user to login. - After the user has logged-in, pop-up window closes. Then the callback function of
SC.connect()gets executed. Inside the callback function, we make a GET request to the/meendpoint which returns the object of currently logged-in user. In the callback of the GET request we just made, we store the user’s permalink in the variableuser_perma, which is defined in global scope, so we can use it later. - The functions
setUI(),getTracks()andgetPlaylists(), set up the UI, list the user’s tracks and list the user’s playlists respectively. These functions are defined in the same file.
// play something
function play(uri) {
    url = "http://soundcloud.com/" + user_perma + "/" + uri;
    SC.oEmbed(url, {maxheight: 200}, function (resp) {
        $("#player").html(resp.html);
    });
}

// when a track or playlist gets clicked, play it using `play()` function
$("ul").on("click", function (e) {
    var title = e.target.innerHTML;
    if ( tracks.hasOwnProperty(title) ) {
        play(tracks[title]);
    } else if (playlists.hasOwnProperty(title)) {
        play("sets/" + playlists[title]);
    }
});
- When any track or playlist name gets clicked, the
play()function executes, which embeds an audio player in our page using theSC.oEmbed()method, for that track or playlist .


Comments